
Findings are the unsung heroes of jewelry—tiny parts that keep everything secure, wearable, and professional. Here’s a friendly guide to choosing clasps, sizing jump rings, picking the right ear wires, and finishing like a pro.
1) Clasps (pros, cons & use cases)
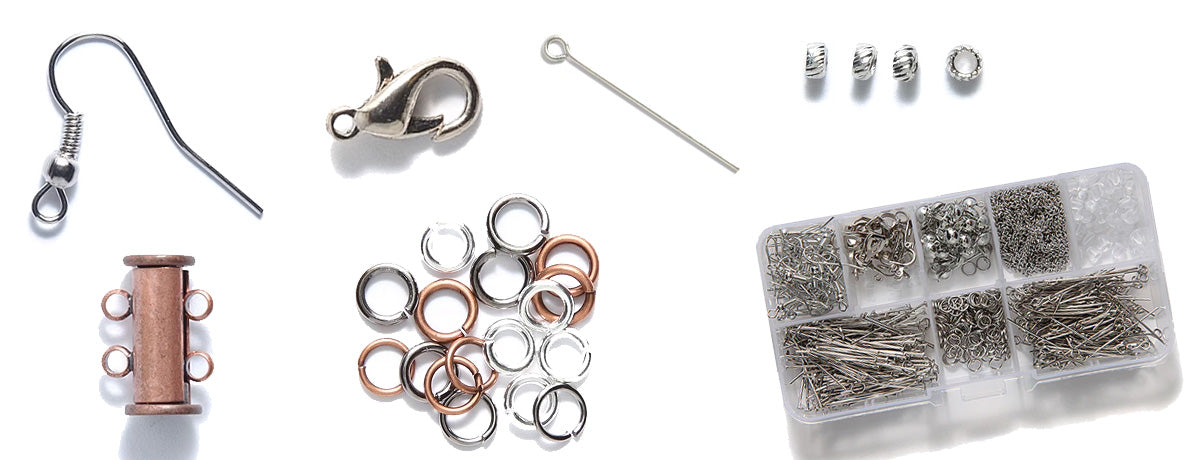
- Lobster clasp: secure and durable; great for everyday necklaces/bracelets. Pair with a closed (soldered) jump ring at the chain end for strength.
- Spring ring: petite and tidy; best on delicate chains and lightweight pieces.
- Toggle: easy on/off and stylish front‑closure option; works best when the piece has a bit of weight and the bar can’t slip through the ring.
- Magnetic clasp: ultra‑convenient; ideal for limited dexterity. Use strong, jewelry‑grade magnets and a safety chain on heavier designs. Note: not recommended for those with certain medical implants—include a small caution on your tag.
- Hook & eye / S‑hook: elegant, adjustable; add a safety chain for bracelets.
- Slide/box clasps: multi‑strand designs and higher‑end looks.
2) Jump Rings & Split Rings
Size & gauge basics: choose the smallest ring that still moves freely and won’t “keyhole” under tension.
- Everyday chains/pendants: 4–6 mm OD in ~18–20 ga is common.
- Bracelets & heavier pendants: 6–8 mm OD in ~16–18 ga for strength.
- Saw‑cut vs. machine‑cut: saw‑cut closes more cleanly for a nearly seamless finish.
- Open vs. closed (soldered): use closed rings at stress points (clasp ends); add a second, opposing ring for security.
- Split rings: like tiny key rings—more secure than a single open jump ring; great for charms on bracelets.
- Open/close technique: twist side‑to‑side with two pliers—never pull apart.
3) Crimps, Wire Guardians & Covers
- Crimp tubes vs. beads: tubes compress more evenly; match crimp size to wire diameter.
- Common pairing: 0.015–0.018″ wire → #2 crimp tube (check brand charts).
- Crimping tool: creates a two‑step fold for a neat, reliable finish; add crimp covers for polish.
- Wire guardians: protect beading wire from abrasion at the clasp—highly recommended.
4) Head Pins & Eye Pins
- Gauge & length: 20–24 ga in 1–3″ lengths covers most drops/dangles; thicker for heavier beads.
- Head styles: flat head, ball head, decorative heads; choose to complement the design.
- Form a clean loop: 90° bend above the bead, trim, then roll a loop with round‑nose pliers; for wrapped loops, leave a tail to wrap down neatly.
- Eye pins: pre‑made loop on one end—handy for articulated links and chains of beads.
5) Ear Wires, Posts & Hoops
- French hooks (fishhooks): classic and comfortable; add silicone stoppers for security.
- Leverbacks: secure and elevated; great for higher‑value earrings.
- Posts & clutch backs: sleek and stud‑friendly; use flat pads for gluing discs or stones.
- Hoops & kidney wires: lightweight, modern; kidney wires latch closed—good for active wearers.
- Metals for sensitive ears: niobium and titanium are excellent; sterling and 14k/Gold‑Filled work for many shoppers.
6) Bails, Connectors & Extenders
- Pinch bails: fast, professional pendant attachment—match to the pendant hole direction.
- Fold‑over & glue‑on bails: for flat stones or glass; choose a surface that bonds well.
- Connectors & links: add articulation; use soldered links at stress points.
- Chain extenders: 1–2″ at the back with a tiny charm—adds adjustability and branding.
7) Metal Choices & Hypoallergenic Tips
- Gold‑Filled vs. plated: gold‑filled has a thick bonded layer that outlasts plate—excellent for everyday wear.
- Sterling (925) & Argentium: classic; polish with cloths and store with anti‑tarnish tabs.
- Brass & copper: warm tones; seal or wax if you want to slow patina on skin‑contact areas.
- Nickel sensitivity: label materials clearly and keep true hypoallergenic options on hand (niobium/titanium).
8) Tools That Make It Easy
- Chain‑nose, round‑nose, and flush cutters (the holy trinity).
- Crimping pliers + calipers (to match crimp sizes to wire).
- Nylon‑jaw pliers to straighten wire; cup bur to smooth ear‑wire tips.
Troubleshooting & Quick Fixes
- Jump rings opening? Use thicker gauge, saw‑cut rings, or double‑ring the connection.
- Bracelets unclasping? Switch to a lobster or magnetic + safety chain.
- Crimps slipping? Size mismatch—use the correct tube size and a crimping tool.
- Ear irritation? Offer niobium/titanium ear wires; clean components before assembly.


1 comment
Great article, very informant! I am new to this jewelery making and was pleased to see this article.